 by
by 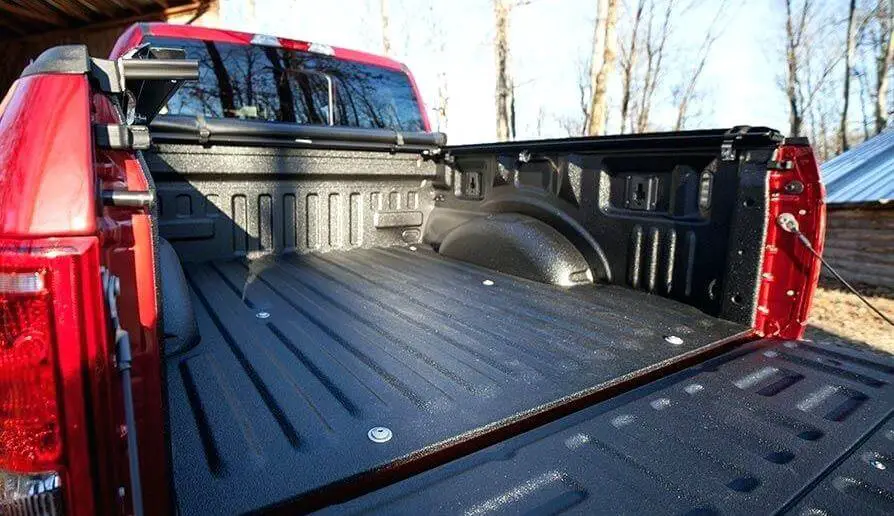
Table of Contents
If you have a truck, the best is very important. It is virtually the most valuable part because it allows you to dump or carry anything you may need for your journey comfortably without interfering with your comfort.
It is also meant to be used for rough applications such as carrying marl, dirt, sand, cinderblocks and similar items. However, for it to serve you loyally and in the best possible manner, you need to take care of it.
One of the popular ways to take care of your truck’s bed liner is by painting it. But what are the costs, advantages and disadvantages, pros and cons of a bed liner paint job?
In this article, we will look at bed liner paint job pros and cons as well as an easy step-by-step guide to applying the bed liner paint all by yourself!
Bed Liner Paint Job Pros and Cons
In this article, you will get all the information that you need regarding the costs, advantages, disadvantages as well as a guide on how to do it on your own in just three simple steps and also alternative methods. So read along to know everything there is about bed liner paint jobs.
The Pros And Cons Of A Bed Liner Paint Job
There is a lot of mixed reactions regarding bed liner paint jobs. Different individuals have different experiences. However, where, and how your painting is done plays a critical role in the overall outcome.
You may be surprised to get the exact touch you wanted, and another may hate the aftermath. This is to let you know that, there are both pros and cons of the job, and it is up to the vehicle owner to decide what they want.
The Pros of Bed Liner Paint Job
Economical:
You can protect your truck’s bed in so many ways available in our markets today. Most certified and popular companies today use thick rubber material to protect the surface from damage while others offer a spray in or drop in bed liners. All these are efficient ways of saving the bed and making it last longer. But for those economic conscious truck owners, there is a more economical durable and very reliable option of protecting the bed liner—the paint. The paint is relatively economical and budget friendly compared to other options. Anyone can do the painting, which saves money.
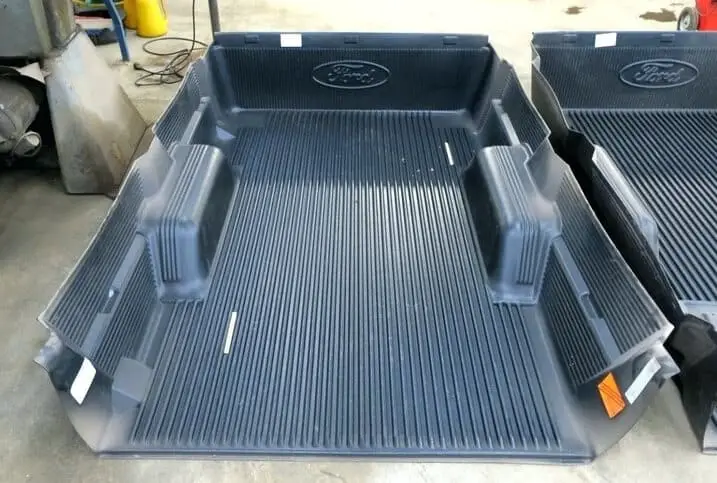
Colored Bed Liner Paint Job:
There are many color choices available, which you can well apply to get your ideal look and finish.
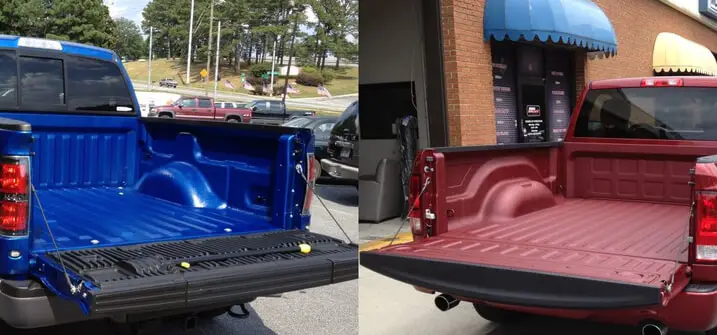
Colored Bed Liner Paint Job
Whereas using rubber or some other sort of material limits your creativity, paint allows far more options.
Today, a colored bed liner paint job is a popular choice. Some people just go for a white bed liner paint job though.
- Durability: It is indestructible and durable. After all, its paint.
- Visual: Painted bed liners look undeniably great when done professionally.
- Easy To Clean: Normally there are two coats, which makes it easy to clean
The Cons of Bed Liner Paint Job
Requires Expertise:
The outcome may not be great if you are not an expert. There are high chances of bug sticking on the wet paint if you are not doing the work in an enclosed garage.
Health Issues:
Can cause health problems if using a spray gun without a respirator.
Time Consuming:
Can be quite tiring and time-consuming when working alone. You may have difficulties reaching some areas or may paint on the windows and mirrors which could damage the look
The Cost Of A Bed Liner Paint Job
There is no specific fee for a bed liner paint job, but the experts will usually charge between $100 to $800 some go way up to $1000 on exceptional cases.
Different companies will charge differently based on various things like the location. If you have made a decision to do the paint job for your bed liner, the starting fee ranges between $80 and $100 going up.
For the professional bed liner spray, you may need to cough between $800 and $1000. The bed liner paint job is not rocket science; any truck owner can do it themselves and complete within a few hours.
It is quite economical, and the owner can do the job as they well wish. If you want to create a new look for your truck, read on to know how to do it.
Bed Lining Your Vehicle DIY
This guide like we mentioned is an interesting one for truck enthusiasts and individuals who like to take their vehicles off-road. Bed liner ensures that you have a hard, durable surface that won’t easily get damaged by a few flying rocks or get dirty when you are on your tours.
Bed Lining Your Vehicle DIY
This is a project that you can easily accomplish in one weekend if you are into it. Now let’s look at what you will need to have everything in order.
Materials And Tools
-
U-pol Raptor Liner: You can pick either black or tintable which costs around $120. Be sure to take two kits if you suspect that one won’t be enough for the job.
-
Paint: You must have already figured out whether you want black or tintable kit if you picked tintable, you would need to pick out a color of your choice. So, head to your local paint shop and get your choice.
-
Approved respirator: This one is to protect you from harmful particles.
-
A U-pol Spray gun: The price for the u-pol spray gun varies from one shop to another. Therefore, it depends on where you purchase it. Some u-pol kits may also include it, so you don’t have to buy separately. The average cost is around $20.
-
Masking Paper: You will need this paper to protect the windows and anything else that you do not want the liner on.
-
Automotive masking tape or 3M: This is to be used for mask off your truck.
-
Sandpaper and DA sander: For better, long-lasting outcome, you will need Sandpaper and DA sander to scuff off the surface of the vehicle and create a more bondable surface for the bed liner.
-
Air compressor: A 60-gallon compressor will be enough. Sometimes it could be more—assess and find out your ideal compressor and head on with it. However, you will need to take breaks every now and then to allow the compressor to catch up.
You have made a list, hit the shops, and shopped for your items. The next part is getting the job done and putting everything all together. Let’s now get down to work.
Step 1: Prep The Vehicle
It is quite essential to get organized before getting to work. You can begin by first preparing the vehicle for the paintwork. Let’s start off with the basics.
-
Clear Out Everything: This step will depend on how far you want to go with your bed liner paint job. Remove everything from the vehicle, particularly those movable items and personal belongings.
-
Mask Everything: Mask off everything else that you do not wish the bed liner on. This is the step that you will need to make use of your automotive tape and masking paper.
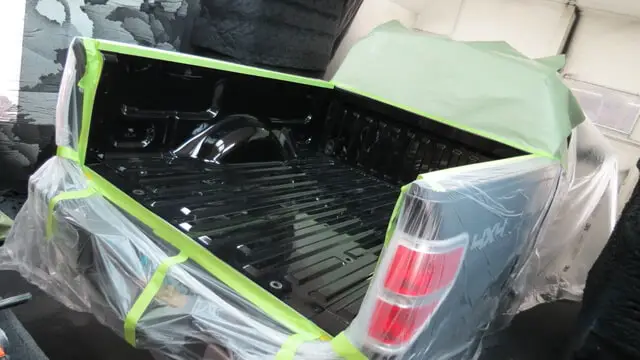
Mask bedliner for paint job
A crucial point to keep in mind—don’t rush your masking task. Do it slowly ensuring that every part is well covered and adequately taped to prevent the paint from going where it wasn’t supposed to.
Remember the stuff is almost impossible to get rid off. So you don’t want to mess up.
- Scufthe vehicle: Use sandpaper and DA to ensure the bed liner sticks. You will similarly need to take precautions on this one because if you clip your masking paper or tape with DA, you will to again re-mask the portion—something you may not like.
If it is a part that you are not able to get the DA on, scrape using your hand.
When done, wipe off the paint dust that may have accumulated and do one last inspection to make sure that you did not leave any part undone. If everything looks great, head on to the next step.
Step 2: Spray The Bed Liner
The next part is an easy one. Be sure to read and follow the directions on your U-Pol kit. It lets you know the amount of paint and how much hardener you will need to add to the U-Pol bottle.
The instructions then request you to shake and fix your spray gun. Then spray!
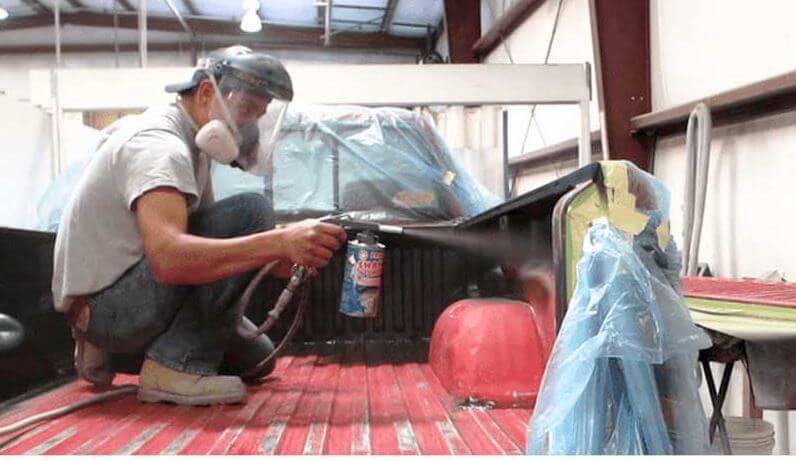
Spray on bedliner
Things to know in this step
- IMPORTANT: put on your respirator when working.
- The further you keep your spray gun, the better the texture will become on your truck. Play with your spray gun to find what really works for you.
- Ensure that you have a pretty thick coating on. Look for thin areas where you may still be able to view the panel of the truck and cover it.
- After applying the bed liner, give it time to dry. And if you have to keep your spray gun for other purposes, it is essential that you clean it immediately after use.
Step 3: Unmasking
This is undoubtedly the most exciting part. It is preferably easier to unmask when the liner still kind of tacky.
This will ensure that the masking tape does not become part of the vehicle. This DIY project is best for people who are interested in doing their own bed liner paint job.
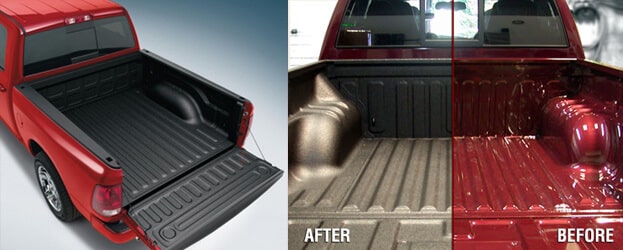
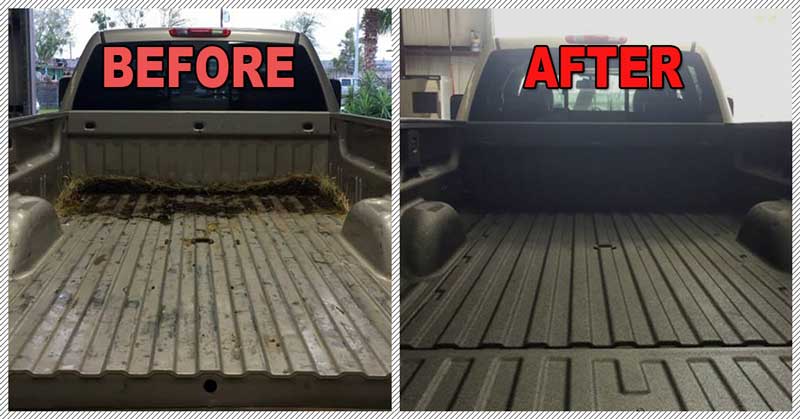
Bedliner paid job before and after
Alternatively, if you do not intend and like the idea of spraying, you can go the paint-only way. This method is simple but may take longer than the spray method.
Bedliner paint job unmasking
However, if you are ready to go down with it here is the how you can go about it.
Do It Yourself Alternative Bed Liner Paint Job Guide
Follow these ten easy steps to get your bed liner paint job done.
-
You will need to decide the paint brand you want and start right away. A right angle is the most preferred for the spin sander.
-
Carefully clean the surface of the sanded pain using your compressor blower. Ensure that it is thoroughly cleaned all the debris and other particles for a much better outcome.
-
Remove all vehicle budges to avoid painting over them and keep them somewhere safe. Be careful not to tear or mishandle to avoid giving your truck an ugly look when you put them back
-
When you are done with the budges, do some more sanding around the areas you want to paint. This will help the paint to bond firmly and adequately with the surface.
-
The next step is to rag and clean the surface to make it easy to wash the vehicle.
-
The next part needs to be done carefully and adequately. Stick some tapes to the parts that you don’t want to paint and ensure that it is firm enough not to come off while you are painting. Sections where the badges are, handles, locks, and side mirrors are not to be painted. Make use of what you have to ensure that they are well covered. Masking papers or even newspapers will do a great job.
-
In this step, decide the liner texture and color that you want. Get it and open it. Don’t forget this crucial step–to stir it quite well. You can either get an exemplary apparatus to help you with the process or simply use what you have to make the magic happen. This could be a drill or a blender part.
-
When you are done with color mixing, the next part now is to pour the paint in a separate container. This is optional, but having the paint in the container is somewhat more comfortable for you to dip and turn the roll brush faster. As for the brushes, use what works well for you.
-
Do your first coat. Be sure to paint in a single direction to get a better texture for your truck bed. After you are done with the first layer, give it time to marry with the surface before adding the next layer. Then add the next layer after an hour. Be careful not to drip as you work.
-
At last, you are ready to have a completely new look for your big four. Remove all the tapes and put back the badges and you are done with your bed liner paint job.
Conclusion
The bed liner paint job can be an exhilarating yet tiresome and time taking. It can also give you the ideal style or simply ruin the entire look of the vehicle.
That is why we recommend only the experts or anyone who is passionate about it.
Just be sure to have all the materials in place and take your time in every single task. We hope this article has helped you get an idea or even a way of accomplishing the task.