 by
by 
Table of Contents
Intro
If you have a GM car from 1980 to 1995 then there is a major chance that you have the OBD1 connector (ALDL).
OBD1 connectors are special connectors that apply to Pontiac, Oldsmobile, Chevrolet, GMC, Cadillac, and Buick vehicles.
While these connectors are older, the great thing about them is that you can easily read these codes without any diagnostic tools.
So, while there are many special diagnostic tools that can read these connector codes, using a diagnostic tool is not entirely necessary.
In fact, to can check ODB1 codes, all you need is a paperclip. Let’s see how you can check Obd1 codes with a paperclip. It’s a great way to read your trouble ODB1 codes for free!
Steps To Check ODB1 Codes With A Paperclip
It’s easy to check ODB1 codes with a paperclip. In fact, you can do it in just 3 quick steps.
Here’s the quick 4-step illustration to check your ODB1 codes with a paperclip:
1. Fin A Paperclip
Most people have paperclips thrown down around their house. Find a paperclip and bend or form it according to your diagnosis box.

Odb1 paperlcip
2. Insert Into Test Terminal
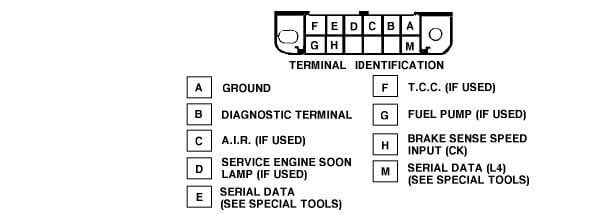
First, ensure your engine is off. Once the key is off, attach the paperclip to both ends of the test terminals A and B (where you would normally place jumper wires):
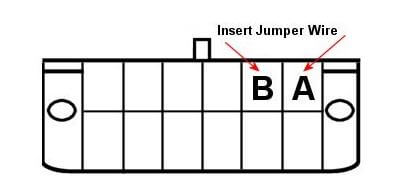
Odb1 terminals
- A = Ground
- B = Diagnosis Terminal
When in place, securely, turn key clockwise without starting up your engine.
In this state, the system will enter diagnostic mode.
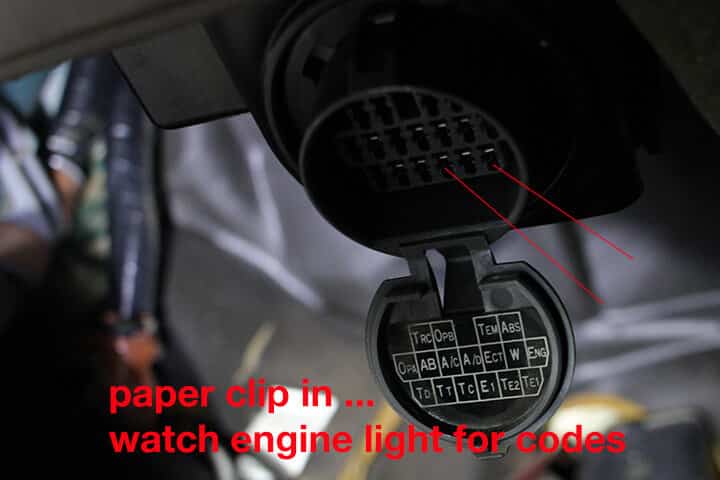
3. Check and Write Down The Codes
Now that the system is in diagnostic mode, its time to check the codes. In this mode, the vehicle’s computer will display a Code 12, three consecutive times.
It will do this by flashing the “CHECK ENGINE”, “SERVICE ENGINE SOON” or “MALFUNCTION INDICATOR LAMP” or light.
Check odb1 codes for free
What is a Code 12? A Code 12 consists of one flash, then one short pause, then two flashes in rapid succession. as such, it should be easy to identify.
After Code 12 is displayed, its time to look for specific trouble ODB1 codes. These codes will be displayed by flashing the “CHECK ENGINE”, “SERVICE ENGINE SOON” or “MALFUNCTION INDICATOR LAMP” light. These codes are all displayed 3 times each and then a code 12 will repeat.
The last step in reading the codes is to simply write down the codes and fix the issue with the vehicle.
ODB1 trouble codes
Here are the ODB1 trouble codes:
-
12 - System normal
-
13 - Oxygen sensor circuit open
-
14 - Coolant sensor high resistance or shorted
-
15 - Coolant sensor circuit low or open
-
16 - Direct ignition system (DIS) fault in the circuit
-
17 - Camshaft position sensor fault
-
18 - Crankshaft or camshaft sensor error
-
19 - Crankshaft sensor circuit fault
-
21 - TPS sensor out of range
-
22 - TPS sensor signal voltage low
-
23 - Intake air temp sensor out of range, low
-
24 - Vehicle speed (vss) sensor circuit fault
-
25 - Air temp sensor out of range, high
-
26 - Quad-driver module (computer) circuit #1 fault
-
27 - Quad-driver module (computer) 2nd gear circuit
-
28 - Quad-driver module (computer) circuit #2 fault
-
29 - Quad driver module (computer) 4th gear circuit
-
31 - Camshaft position sensor fault
-
32 - EGR circuit fault
-
33 - Map sensor signal out of range, high
-
34 - Map sensor signal out of range, low
-
35 - Idle air control sensor circuit fault
-
36 - Ignition system circuit error
-
38 - Brake input circuit fault
-
39 - Clutch input circuit fault
-
41 - Camshaft sensor circuit fault, ignition control circuit fault
-
42 - Electronic spark timing (EST) circuit grounded
-
43 - Knock sensor or electronic spark control circuit fault
-
44 - Oxygen sensor lean exhaust
-
45 - Oxygen sensor rich exhaust
-
46 - Pass-key II circuit or power steering pressure switch circuit fault
-
47 - PCM data circuit
-
48 - Misfire diagnosis
-
51 - Calibration error, mem-cal, ecm or eprom failure
-
52 - Engine oil temperature circuit, low temperature indicated
-
53 - Battery voltage error or egr or pass-key II circuit
-
54 - EGR system failure or fuel pump circuit low voltage
-
55 - Converter error or pcm not grounded or lean fuel or founded reference voltage
-
56 - Quad-driver module #2 circuit
-
57 - Boost control problem
-
58 - Vehicle anti-theft system fuel enable circuit
-
61 - AC system performance or degraded oxygen sensor signal
-
62 - Engine oil temperature high temperature indicated
-
63 - Oxygen sensor right side circuit open or map sensor out of range
-
64 - Oxygen sensor right side lean exhaust indicated
-
65 - Oxygen sensor right side rich exhaust indicated
-
66 - AC pressure sensor circuit low pressure
-
67 - AC pressure sensor circuit or a/c clutch circuit failure
-
68 - AC compressor relay circuit failure
-
69 - AC clutch circuit head pressure high
-
70 - AC refrigerant pressure circuit high
-
71 - AC evaporator temperature sensor circuit low
-
72 - Gear selector switch circuit
-
73 - AC evaporator temperature circuit high
-
75 - Digital egr #1 solenoid error
-
76 - Digital egr #2 solenoid error
-
77 - Digital egr #3 solenoid error
-
79 - Vehicle speed sensor (vss) circuit signal high
-
80 - Vehicle speed sensor (vss) circuit signal low
-
81 - Brake input circuit fault
-
82 - Ignition control (IC) 3X signal error
-
85 - Prom error
-
86 - Analog/digital pcm error
-
87 - Eprom error
-
99 - Power management
4. Reset The Codes
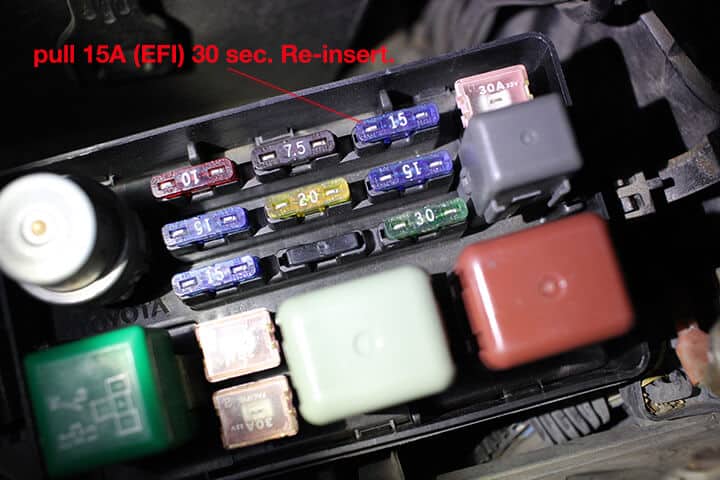
Once you have read the codes and fixed the problem, its time to reset the codes. To clear the codes, simply pull the fuse for about 15-30 seconds.
This process will reset the ECU. be careful not to yank your battery’s negative terminal.
Finally, just to ensure that the problem is properly fixed, drive the car around the city for 75+miles or on the highway for 150+ miles.
Once you have done that, see if the code pops back up with the paperclip method. If it does not, that means you are good to go!
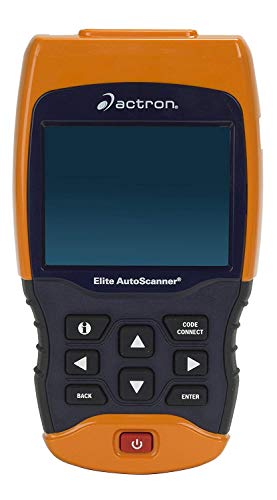
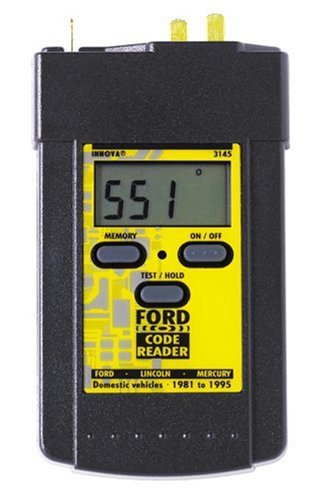
Still Want An ODB1 Scanner?
If you are insistent on getting an ODB1 scanner, then here are the bets ODB1 scanners on the market: